Showing posts with label Ampersand Clayboard. Show all posts

Wednesday, August 21, 2024

Varnishing Colored Pencil - Part 2


I wanted to use the water based Golden Gloss Waterborne Varnish to varnish my artwork but found it is quite different from the previous Golden UVLS Varnish. I emailed Golden to ask questions after making a few mistakes (they are pictured at the end of this entry). The Golden rep was very helpful in suggesting the best way to add isolation coats the artwork before applying the Waterborne Varnish. 

My colored pencil drawing shown here is mounted on a small Ampersand Cradled Claybord. I first sprayed my drawing with 4 light coats of Krylon UV-Resistant Clear, allowing each coat to dry in between applications. The Golden Rep suggested using the Golden Soft Gel (I used Gloss) as an isolation coat because it is softer bodied than other gels and goes on smoother. I diluted a small amount of Golden Soft Gel Gloss 50% equal parts with water. I mixed it very carefully with a small whisk to be sure there were no lumps and few air bubbles. 

Be sure to use a soft nylon brush. The brand I have been using is Gold Taklon by Craft Smart that I purchase at Michaels Craft Store. They are inexpensive and I throw them away or use them for other things when they get older and stiff.

I applied The gel with the soft nylon brush with horizontal strokes over the Krylon UV-Resistant sprayed surface in one application. I did not go back over once I had the surface coated. I let the gel dry for 24 hours (although I'm not sure you would need to leave it for that length of time).

I mixed the Waterborne Varnish: 5 parts varnish to 1 part water. Next I took a clean damp lint-free cloth and gently wiped the surface with the dried gel medium. This removes any particles and the dampness seemed to make the surface easier to accept the varnish. Now I applied the diluted varnish with a soft brush moving horizontally across the piece and not going back over any of the areas. 

Below is my little cupcake drawing with this varnish technique. I took one photo with the piece tilted so you can hopefully see the smooth surface. I am happy with the outcome! You can read more about working with the Waterborne Varnish here.


What Not To Do!

In the photo below, I mixed the Waterborne Varnish 3 parts to 1 part water and tried to brush it on over my surface prepared with Krylon UV Resistant Clear spray and Kamar Varnish spray as an isolation coat. The Waterborne was too thin and puddled on my drawing. Fortunately my drawing was well isolated with the sprays and I could easily wash off the Waterborne Varnish. 


In this photo of the leaf drawing I used Golden Regular Gel that more stiff than the soft gel and it left brush strokes when applied. 


Wednesday, October 16, 2019

Pet Portrait of Nikki


 I was asked to create this pet portrait as an anniversary gift for the owners of this beautiful Golden Retriever Nikki. My customer asked for a small piece that could be hung or displayed on a stand. We decided on an 8x8"image in colored pencil that would be mounted on Ampersand Clayboard 3/4" cradled panel to be unframed and varnished.

I chose to work on Fabriano Tiziano paper, the color is Felt Gray. This is one of my favorite papers for pet portraits. I like the textured and flecked background so I will let the paper show through as the background behind Nikki.

My first step is to layout the drawing and put in the outlines in graphite pencil. I don't have to add a lot of detail to my initial line drawing but I want to be sure I have important features such as the eyes, nose and mouth in the proper positions. Using a sgraffito tool (has a blunt pointy end that will impress lines into the paper) I have impressed lines into the paper where the whiskers and some of the hairs will be. That way I can add color over the area and the whiskers will remain the color of the paper.


Using Prismacolor, Derwent Drawing and Luminance colored pencils I add white, cream, warm yellows, red browns, browns and warm grays to the drawing building and layering colors on the paper. Some of the areas have been burnished with a bristle brush; particularly the eyes, nose and tongue. My customer asked me to leave the drawing somewhat "sketchy" and simple and I did that by letting the drawing softly flow to the edges.

I did receive feedback from the owners and they love the piece. It's small enough to fit in a small space on the wall and enjoyed every day!

Tuesday, August 16, 2016

My Colored Pencil Workshop for CPSA

I was honored to be asked to be one of this year's workshop instructors at the Colored Pencil Society of America's international conference and exhibition in Tacoma, Washington. This one-day workshop is called Colored Pencil Goes 3D and I taught students how to design and finish a colored pencil box. In this workshop I taught the process of image transfer and then adding colored pencil on top, thus skipping the step of sketching out the design and also having somewhat of a grayscale image to help with the values. After completing two small drawings we learned how to adhere the drawings to the top and inside of the 5x5" Ampersand Claybord Box Kit.

Here are photos of just some of the very creative students working on their drawings. 


Here you can see this student is creating a seahorse drawing. The black and white image is shown along with the color reference photo and her small drawing is in front of her.


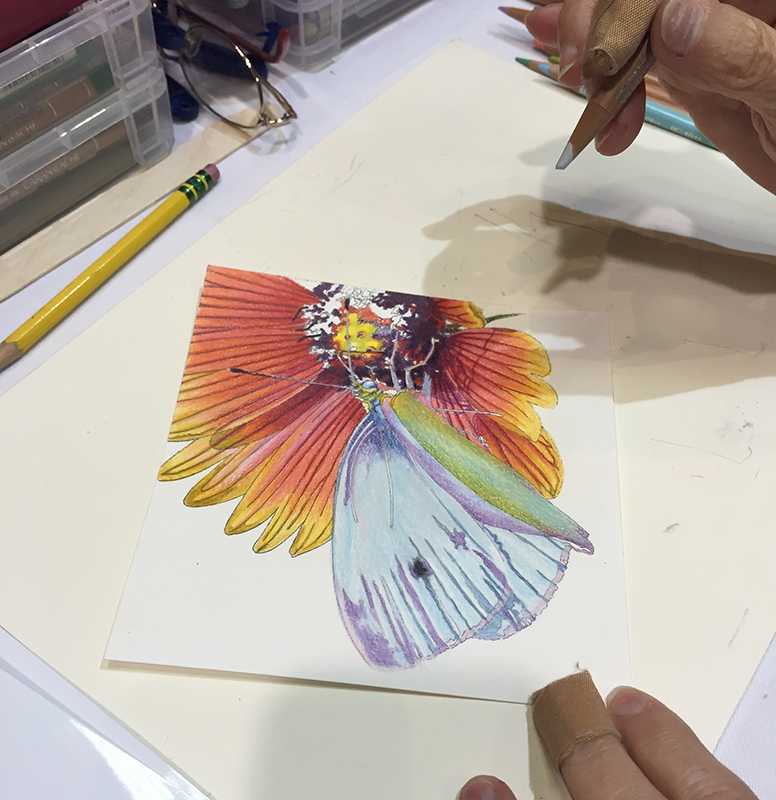
This student created a beautiful butterfly with colored pencils and I liked the way she left the transferred black and white image in the background without adding color.


This student decided to skip the image transfer process and drew directly on the Claybord surface with graphite, colored pencils and black marker. The Claybord is very smooth so it will only accept a limited amount of colored pencil but look how beautifully she is managing the floral design.

See more examples of creative artwork below! Everyone had their own variety of subjects and styles.


Wednesday, November 25, 2015

Pet Portrait Commissions


I am posting my three latest pet portrait commissions and the photos I worked from. I take commissions from customers and enjoy working on pet drawings. 

The first (above) is Chester, I was commissioned to draw his portrait in 8x8" colored pencil, varnished and mounted on an Ampersand 3/4" cradled Claybord. I am attaching the photo I worked from because it was not a good reference photo. Fortunately, the customer had other photos of Chester for me to use as reference to get the color of the fur, eyes and details.


Here is Rocco, he is drawn in colored pencil on white Stonehenge paper, 11x14". He was then matted and framed under glass for the customer. I've included the reference photo I used to work from. 


Here is Cyrus, also 8x8" on Stonehenge paper mounted to Ampersand 3/4" cradled Claybord. The first photo is his portrait, the second is a side view in order to see the Cradled Claybord and sealed/varnished drawing. The third is the reference photo that I worked from. 


Tuesday, March 24, 2015

Image Transfer with Gesso

 Here is another type of image transfer I have been experimenting with. I begin with a black and white image reversed and printed out on my laser printer, this can be a photo or a line drawing scanned into the computer. I have brushed a generous layer of gesso on top of my 6x6" Ampersand Claybord and I lay my printed image face down on the gesso. I gently roll the back of the image with a (Speedball) breyer to adhere the paper to the gesso, evenly covering all edges and allow the gesso to dry overnight. For more in depth instructions, see Dana Brown's demo on the Ampersand Art website.

When the gesso is dry, I add a little water to the back of the paper and gently rub with my fingers. Layers of the paper will come off leaving the black and white image on the gessoed Claybord surface.  This process takes a while and you must be patient and remove the paper gently as to not remove the image itself. As you see in the photo, I work small parts of the image at a time and brush off the paper flakes with a soft brush.

 Here is my image with some texture from the gesso, it creates a unique surface in which to add color with colored pencils or watercolor pencils. The gesso alone is a bit slick and won't take colored pencil but the image itself will hold the waxy pencil.

These are my nine 6x6" cradled Claybord panels that will hang together as a series. The seaweed, the nautilus shell and the sea urchin are gesso transfers and the other six are image transfers with CitraSolv as explained in my last blog entry.

I like both of these methods as a quick alternative to detailed line drawings as a base for color. I will varnish these pieces and they will hang just as they are shown here.

Monday, June 16, 2014

Orchids with Gold


Here is a new colored pencil piece I have been working on between pet portraits. I took this reference photo of an orchid I purchased against a dark wall and was intrigued by the contrast of colors and the drama of the composition. My original photo seemed "top heavy" so I added a few more roots moving in different directions to the bottom of the plant.

The surface I used is Strathmore Art Again paper, Moonstone colored, and the drawing is 12x12". As an experiment, I chose a neutral gray color in which to work, leaving some of the paper showing through on the roots. The blossoms are very delicate and I always enjoy creating shadow and values in white by using various colors instead of gray. I am always fascinated by the unique shapes, lines and colors of orchids and so enjoy drawing them.

When I finished rendering the orchids in colored pencil, I mounted the paper onto a 12x12" Ampersand cradled Claybord securely with Grafix Double Tack Mounting Film so I would work on the background in watercolor pencil and the paper wouldn't buckle. I began with a layer of Derwent Inktense and Caran d'Arche watercolor pencils in various brown colors and then added water with a brush to create an even wash, working carefully around the orchids. However, if I did get some of the watercolor on the waxy pencil drawn areas, I could easily wipe it off.


 When the watercolor was dry, I added Prismacolor Black Raspberry, applied lightly but evenly all over the the background. The brown watercolor underneath and the Black Raspberry were still too warm for a background so I added layers Prismacolor Utramarine and Black Grape over the Black Raspberry but around the flower, leaving the Black Raspberry showing through in areas near the borders for change.

Above is my test sheet. I usually make a test sheet for each piece so I can test colors before I put them on my drawing. At this point, I wanted to add gold to the piece and thought about gold leaf but then thought it might be too solid and detract from the delicate orchids. As an experiment, I picked up some Rub N Buff and tried it on my test paper. I liked how I could apply it unevenly and vary the thickness or thinness of the application so I rubbed it with my fingers into the composition around the orchids, using a masking paper to cover the orchids.

If you're not familiar, Rub N Buff is made of wax and powdered pigment and is used to touch up or restore antiques and frames. I've used it to touch up dents in frames and decided to try it in my drawing. Depending on the light the piece reflects, it will be bright or subtle. I am going to varnish this piece and frame it in a floater.

Friday, June 13, 2014

Bandit's Portrait


I just finally finished this little 8x8" pet portrait of my dog, Bandit's face. I had a small piece of this gray flecked paper with a pattern of small lines running vertically which I believe could be Fabriano Ingres. It is a beautifully textured paper to work on and the gray background was perfect for Bandit so I left the paper showing through around him. I then mounted the paper to an 8x8" Ampersand cradled Clayboard and sprayed it with Lascaux Fixativ to preserve it. Next I sprayed three coats of Krylon Kamar Varnish, letting each dry in between. After which, I brushed on at least six coats of Golden UVLS Polymer Varnish so the piece is quite glossy. It is finished in the same manner as the black lab in this previous post.

My dog Bandit has such a great personality, he is very quiet (except when he sees a squirrel or plays with other dogs) and follows me around everywhere. I treat him like a person and he can be very stubborn at times and also spoiled, he is the only child after all. He weighs in at only 10 pounds but thinks he is a big dog in a little dog's body. I bring him to the studio and he will lay on his bed near me while I work. Who could ask for a better best friend? I love him dearly and wanted to capture his personality forever in this drawing.

Sunday, April 6, 2014

Pet Portraits


I've started a small (8x8") pet portrait of my Yorkie, Bandit's, face close up. I'm working on a Fabriano paper in which I love. It has a textured surface with faintly impressed vertical lines that add a nice texture and pattern to the drawing. Unfortunately, I can't recall or find the name of this paper and I'm not sure if Fabriano even makes it any more. Someone gave me a few sheets more than ten years ago and I just happened to have a small sheet left. I always start with the eyes and nose because those are the most important features to capture the pet's likeness and personality.


Here are two finished dog portraits of this black lab, Ike. Sadly, Ike was hit by a car at a very young age and isn't with us any more. His owner misses him very much. But here is a nice story: the coworkers of his owner got together and commissioned me to create these 8x8" portraits of Ike as a remembrance for Ike's owner. I will be curious to find out how Ike's owner likes these two pieces when he receives them.

I worked the two drawings on white Stonehenge drawing paper and Prismacolor pencils, I cut the paper to 8 1/2 x 8 1/2". When the drawings were complete I sprayed them with two coats of Krylon UV Resistant Clear fixative. Then I attached them to two 8x8" Ampersand Cradled Claybord panels with Grafix archival double stick mounting film and then carefully trim the edges with a mat knife. I always create the drawing a little larger than the board I am mounting it to in case it moves a little. Next I spray the entire piece and edges with three coats of Krylon Kamar Varnish to seal it (or any permanent non-yellowing varnish will work). The final step is to brush on Golden UVLS polymer varnish (water based) and thinned three parts varnish to one part water. Brush carefully in order to not get bubbles and keep it consistent. I will layer on three or four more coats of the Golden varnish letting each dry at least an hour or more in between. I also put two coats on the wood edges. Or you can paint the edges.

Thursday, March 28, 2013

New Grouping of Boxes


Started another grouping of my Ocean Life boxes on 5x5" Ampersand Claybord boxes. I have sold several of the last series of boxes and decided to create another series of boxes. Shown here are seven new cover drawings and three new inside drawings. All of the cover drawings are worked on white Stonehenge paper with image transfer and colored pencil. I adhere them to the Claybord surface of the box top with Grafix Double Tack Mounting Film. I like the bottom drawings to be sturdier so I use white Strathmore rag illustration board, again with image transfer and colored pencil and glue them onto the bottom. The box top drawings are sprayed with one coat of Krylon UV Resistant Clear, three coats of Krylon Kamar Varnish and then several layers of Golden Polymer Varnish with UVLS to make them smooth and glossy.

In the last series I left the natural wood box sides showing and varnished them for protection. In this series I've decided to experiment with painting the wooden sides or collaging some of the box sides with rice paper. I'll explain that in my next post about the boxes.

Thursday, December 6, 2012

Trying My Hand at Encaustics


These two 6x6" encaustic pieces are a surprise gift for my sister in law, Lori, who lives in Florida. If she happens to be reading this blog before they arrive, she's not going to be very surprised. Last spring during a visit to Florida, Lori and I went through galleries in her town of Mt. Dora. In one of the galleries, she noticed similar encaustic pieces and mentioned that she liked them. It seemed like a project I could handle, especially with several other artists in my studio who work in encaustics so I came home with a plan. Of course, the plan took months to actually come to life but here it is.

My process is to choose two of my photos that I felt Lori would like, resize them and print them out on my inkjet printer. I purchased two 2" cradled Ampersand Claybord panels and affixed the photos to the Claybord with gel medium. After it dried, Felicia Touhey helped me learn how to brush on layers of hot wax, smoothing the wax out with a heat gun, filling in grooves with a palette knife, and so on. I even got creative and tried green wax on the sides of one piece. It was fun, maybe I'll try this again.

Sunday, December 2, 2012

Colored Pencil Magazine & Current Exhibit


I was really excited to be asked to be a contributor in the December issue of Colored Pencil Magazine. The article features my colored pencil boxes and how I created them from Ampersand Claybord boxes and colored pencil drawings. To purchase a copy of the December issue, go to this link.


Here are pictures from my recent exhibit at Angelina's Coffee in Bristol, RI. Above is some of my artwork pictured in the cozy sitting room complete with a record player and albums. Now how often do you see that anymore?


Julio Amaro (pictured) and Larry Lawrence played for the Art Night reception last Thursday night. My friend, Sharon Holmes, who is a fabulous singer sat in with Julio to sing a few songs.


The two photos above show m two candy apple photos next to the door and part of the counter and holiday tree, everything was so festive. Notice the walls are painted aqua blue above the white chair rail and red below, so warm and inviting.

Saturday, October 6, 2012

Ampersand Art Supply: Featured Artist: Kendra Ferreira

Ampersand Art Supply has featured me and my current colored pencil box project on their blog!


Ampersand Art Supply: Featured Artist: Kendra Ferreira: Box Lids for the upcoming show at the Providence Art Club Rhode Island artist, Kendra Ferreira, is currently working on a series of Cla...

Friday, October 5, 2012

Ocean Life Claybord Boxes

Here they are, my nine finished boxes. Each are 5x5" with a colored pencil drawing on the top and a smaller drawing on the inside. Inside drawings were done on Strathmore illustration board, outside drawings were done on Stonehenge white or cream paper attached to the claybord surface with Grafix double tack mounting film. I had so much fun with this project, pardon the pun but it was "out of the  box" for me. I like the idea of creating 3D art, doing something a little different other than work that hangs on the walls. I will be exhibiting these pieces at my Providence Art Club exhibit opening Sunday, October 21st and am excited to get feedback from the viewers. Also, I will be selling the boxes individually or in a grouping.


This last photo is a better look at the nine inside drawings.

Wednesday, September 12, 2012

Ampersand Clayboard Boxes


I purchased nine 5x5" clayboard box kits from Ampersand with the intention of doing a series of drawings on the tops of the boxes and inside the boxes when the covers are lifted. I've chosen ocean life as a theme and worked on the drawings for the tops of the boxes shown here, placed close together. Because the clayboard is too smooth of a surface to draw on, I'm using white stonehenge paper or white bristol paper, although the turtle is drawn on cream stonehenge. The mediums I have used are image transfer and colored pencil. Image transfer is a process in which I take a Xerox copy of a drawing or photograph and transfer it onto the paper with a Chartpak colorless marker. Of course the image will come out in reverse so I have to switch it accordingly. Next I add colored pencil to the transfer and around. Some of the backgrounds I chose to leave white and some are colored.

My next step is to decide what smaller images I want to place inside each box and work on those. I'm doing this series for my upcoming exhibit at the Providence Art Club in October. I will show these boxes on pedestals as 3D artwork and most likely in smaller groupings.

Also, Ampersand has used my colored pencil piece on Gessobord Patti's New Bowl in a recent blog entry for the company's fall sale on the different boards.

Wednesday, June 20, 2012

CPSA Silent Auction Piece

This is the colored pencil drawing titled "Flying Away" that I created for the CPSA silent auction which is held during the annual exhibition and convention August 1-4, 2012 in Covington, KY. I worked the drawing on felt gray Canson Mi Tientes paper, although it probably didn't matter what color I used because I covered every little bit with pencil. I used the Icarus Board to help me blend and layer the intense color. I love bright colors and so my blues and greens got quite a work out on this piece. When finished, I mounted it on 8x10" 3/4"-cradled clayboard with archival double tack film. I decided to leave the edges natural wood so I stained them and am varnishing the piece with Golden UVLS polymer varnish to preserve the bright colors.

Thursday, March 8, 2012

Experiments with Colored Pencil and Varnish

This photo is a cropped portion of a 12x16" colored pencil and pastel drawing I did several years ago. In fact it was accepted into and shown at the 2007 CPSA Explore This! Exhibition in Brea, CA (before Explore This! exhibitions became on-line only). I did the drawing is on black Stonehenge paper with colored pencil and bumped up the vibrant colors with pastel on top. The drawing looked so vibrant until I put it under glass to frame the piece. It made the rounds to different exhibitions but never sold so it came back to my studio and hung for a few more years. If it was light in the studio, the piece looked very vibrant but if it was a dark day, it looked dull. I kept glancing at the piece and wondering if I could somehow varnish it so that it wouldn't need to be shown under glass but I was afraid to varnish paper. After reading and learning about Ester Roi's blog entries on glassless framing, I came up with an idea. What did I have to lose? Just a piece of artwork ... but it was worth a try.

First I unframed the piece and adhered just the drawing to a 12x16" Ampersand Claybord with Grafix double tack mounting film adhesive. Next I sealed the drawing with Lascaux UV Protect spray, let it dry and then sprayed two coats of Krylon Kamar Varnish to seal and protect the drawing. I thought the spray might darken the colors but they were vibrant enough and remained so. The drawing sat for 24 hours and next I brushed on several coats of Golden UVLS Polymer Varnish Gloss letting each one dry in between. Here came the problem; I wasn't careful enough when brushing on the varnish, not only was I getting tiny air bubbles but I was getting brush marks. I tried to smooth out one "gloppy" area after the varnish had begun to dry and thus ended up with brush marks. Because the surface is so glossy, if I held the piece to the light, one could see all the imperfections. I learned that you have to be very, very careful when applying the Golden UVLS Polymer Varnish, any imperfection on the surface can be easily seen and detracts from the artwork.

I remembered that when I called Golden company tech support, the person I spoke to told me to be sure the artwork was sealed and protected with a spray varnish before brushing on the polymer varnish. The polymer varnish is water based and he told me that for conservation purposes, if museum quality artwork needed to be cleaned and re-preserved years from now, the polymer varnish could be easily washed off, the piece cleaned and preserved as the layer of spray varnish would not wash off and preserve it.

I was very frustrated with my piece so I took it to the sink and proceeded to wash off all the layers of the polymer varnish, holding my breath and just hoping I wouldn't damage the artwork. All of the polymer varnish washed off but the piece looked wet and cloudy for about a day. I was worried and discouraged I might have ruined it but was pleasantly surprised when I came back to the studio two days later and found the drawing perfectly dry, looking like it had before I started. The double tack mounting film kept the drawing perfectly adhered to the claybord also. I was really happy! I began again brushing on coats of the polymer varnish, much more carefully this time. I made sure I diluted the varnish exactly two parts varnish to one part water and let each coat dry before I applied the next. I didn't count how many coats I applied but I think probably about 6 or 8. I'm very excited because I accomplished what I set out to do, with a little bump in the road in which I learned from. I'm ordering a frame and will exhibit the piece in my studio or in a gallery and will most interested in viewers' comments.

Saturday, February 4, 2012

Learning from Mistakes

My finished piece measures 7x8" and looks lovely in the frame with a smooth, glossy coat of varnish over the artwork it doesn't even look like colored pencil.
My piece in progress, working on Ampersand Gessobord with Terra Cotta Colourfix primer applied, I began working the piece with a thin underpainting of Caran d'Arche Neocolors and water with colored pencil on top. Read below about all my mistakes and how to apply the varnish correctly.

I think I should have titled this post "What Not To Do" because it's what just I've learned. As I've written about in past blog entries, I have been experimenting with different ways of presenting my colored pencil work so that it is varnished and not under glass. I have been admiring Ester Roi's work and her process of glassless framing explained on her blog. Ester uses Golden Polymer varnish with UVLS - Gloss to finish and present her work and I decided to try her method. I read Ester's blog entry a little too quickly and then read the label on the jar of Golden Polymer a little too quickly also, I mixed up the proportions. You mix 2 or 3 parts of the Golden Polymer with 1 part water and I did just the opposite, puzzled by the water-thin varnish and why it was taking 10+ coats to get a nice varnish. My second problem was puddling in areas and my third problem was lots of air bubbles.

In the photo above of my pears which began as an 8x8" piece, I laid the artwork sideways in order to show the problem spot right at the top and center. As I applied the varnish incorrectly, it puddled and left an uneven area which I attempted brush smooth after it had partially dried. However, I hadn't properly sealed the drawing so the pencil smeared when I tried to re-brush the area. Later when it was dry, I attempted to sand the area with a fine sandpaper which only left scratches that I couldn't get rid of (I think you can see them). Frustrated, I called Golden and explained to the representative everything I had done wrong. He sounded mortified and flustered and referred me to the Golden website and the technical information for the product and how to use it correctly.

I learned quite a bit from my flustered Golden rep! First of all, the artwork should be completely sealed with several coats of a non-removable clear, oil based varnish before the Golden Polymer varnish is applied. Part of the reasoning for this is because the Golden varnish is water based and can be completely removed if need be. He also suggested colored pencil use gloss varnish as opposed to matte varnish because matte varnish is porous and provides less UV protection. The rep recommended thinning the varnish with 25% water but I am still experimenting with the percentages as I find if the varnish is too thick, it can be streaky. All in all, I cut off an inch of the pear drawing containing the damaged part and I ended up with a nice, glossy finish on the piece (above).

I'm still having a little trouble getting rid of tiny air bubbles, if anyone has any suggestions please comment. I find varnishing small work is easier to learn on than large work. I recently took one of my older colored pencil drawings on paper, mounted it to Ampersand Clayboard and varnished it in this manner. However, I wasn't careful enough and found a brush hair and some air bubbles on the surface after it had dried. So I took this experimental piece to the sink and was able to wash off the entire layer of Golden Polymer Varnish, let it dry and begin again. Because I had the good coating of oil-based varnish on the drawing, the drawing itself wasn't harmed. I will post it at a later date.

The conclusion: take time to varnish correctly, read all directions, don't rush and be careful!