Showing posts with label still life. Show all posts

Monday, August 23, 2021

Cape Cod Art Center Workshop


I taught a 2-day colored pencil workshop at Cape Cod Center for the Arts in Barnstable, Massachusetts. After an introduction to working with colored pencils: materials and techniques, students worked on small still life drawings to get used to the medium. One the second day we worked the sunflower drawing with colored pencil on UArt 800 sanded paper. I wanted students to become familiar with colored pencil drawing on sanded paper and how it differs from non-sanded (traditional) papers.

Small class and still paying attention to Covid social distancing but it was really fun to be able to work together in person!


Friday, April 9, 2021

Colorful Candy Apple Drawing!

Here is my most recent drawing, I chose to draw colorful candy apples because I love bright colors especially reds! I worked on Strathmore 500 illustration board using Prismacolor and Caran d'Ache Luminance colored pencils. The drawing is 15x15" and I use my own photo reference. I make lots of candy apples and then photograph them for later use. I would prefer to draw from life but they begin to melt and change color and texture rather quickly. So ... we eat them instead! Feel free to ask questions or comment!


Here are just some of the colored pencils I used. Notice the candy apple surfaces don't look smooth. The texture of the paper is showing though the pencil.


In this photo, I used the small bristle brush to burnish color into the paper and create the smooth surface in the apples. I also used the white colored pencil to burnish the light reflected areas by applying white on top of color.


Monday, November 16, 2020

The Swirl


This is a new piece I just finished titled The Swirl. I had been sketching shells in a small sketchbook and thought I might put several together in one interesting type of still life. I chose and positioned the shells on a white board secured with putty. I drew each one individually. But first I started with an underpainting in Derivan Liquid Pencil diluted with water applied using a small watercolor brush. I worked on Strathmore 500 Series Illustration Board which is very sturdy and could hold the water and liquid graphite pencil without buckling. I worked tones/values in black and white and then layered colored pencil on top of the graphite when it had dried. 

This shell (top) has only two colors of blue applied over the graphite. The liquid graphite underpainting helps me establish tones of gray and characteristics within each shell before adding color. My brush and the tube of liquid pencil is pictured below.


Below is how I worked on the piece, adding all of the underpainting in liquid pencil before adding color. I did skip around a bit to draw different shells. My reason for working with these two mediums is to experiment with combining the mediums and also I have been curious about adding an underpainting to the colored pencil. To draw each shell I used a variety of colored pencils: Prismacolor, Caran d'Ache Luminance, Faber Castell Polychromos and Prismacolor Verithin. 


Tuesday, September 29, 2020

Balancing My Tea Cups

I haven't been writing on my blog too much lately and mainly because I have been working on my colored pencil drawings and a few other things. Since the Covid began and I found myself spending more time in the studio, I decided to work on a series of drawings using tea cups as my subjects. I am working these drawings where I am stacking tea cups and also another group of drawings where tea cups are reflecting polka dots, linking to a previous post here.

Many of these tea cups belonged to my (late) mother in law who had them displayed on a shelf in her dining room but later on dismantled the display and gave me the cups. I kept them wrapped and tucked away for many years with thoughts of drawing them in colored pencil. My favorite is the Dragon Tea Cup which is at the very top of the above drawing. Over the years I have collected several others including the colorful bull (just below) from Barcelona Spain and the butterfly cup sent to me by a favorite cousin. 

The first drawing A Fresh Start (19x11") was accepted into the Colored Pencil Society of America's 28th Annual International Exhibition (click on the link to see some incredible colored pencil artworks) and sold shortly after the exhibition came on-line. The second drawing (below) Precarious Balance (18x10") was shown at the Providence Art Club Fall Member Exhibit. 

Both drawings were worked on Strathmore Series 500 Illustration board using a mixture Prismacolor, Caran d'Ache Luminance and Faber Castell Polychromos colored pencils. The Polychromos are a harder pencil and good for rendering smooth glassy surfaces by filling in the paper's "tooth". Prismacolor and Luminance have such rich color, Luminance being more fade resistant so I tend to use them more. 

Here I go again with a third drawing. This time I attempted to stack nine tea cups and photograph the stack. I use my hot glue gun and fishing line to hold the stack of cups in place. I glued the spools of thread between cups in order to give each one the correct height. As you can see, this group tumbled and I had to superglue one tea cup back together. As I draw, I work from my photos and shortened stacks of two or three cups to get perspective, color and shading. 

This is a quick photo of my start for this drawing, beginning with the top cups. I draw the design and shading on each but I will go back later to adjust and evaluate each cup before the drawing is finished. For this drawing I decided to try Arches Aquarelle Hot Press Watercolor Paper to see how it would compare to the Strathmore Illustration board. 


Monday, September 14, 2020

Colored Pencil Shell Study on Wood Panel


I drew this colored pencil piece on an 8x10" Blick Studio Wood Panel  with a 7/8" thickness. I like the smooth surface of the wood and it does not have to be sanded or primed to accept colored pencil. I selected three shells with different shapes and colors and decided how to arrange them on the surface. It took a little bit of figuring how I wanted them to look compositionally. 

First I drew the outlines with lead pencil and added some of the details to help me when adding color. I used Caran d'Ache Luminance and Prismacolor colored pencils to create this piece. The wood is soft so a softer pencil works really well on the surface. I was also able to build up layers easily. 

My drawing kind of evolved, I intertwined the shells and later put in a soft background suggesting sand and sky. 

The fixative/varnish is a three-part process. First I spray the drawing with Krylon UV Resistant Clear, two coats letting the first dry for 15 minutes. Secondly I spray the drawing with two coats of Krylon Kamar Varnish letting each dry for about 30 minutes in between. You may stop here and perhaps spray one more coat. I like a glossier finish so I add a third step. that is to apply Golden Polymer Varnish with UVLS. I mix one part varnish with two parts of water to thin the varnish so it can be easily brushed on with a soft bristle brush. I work in one direction when brushing on varnish and let it sit for about two hours until completely dry before adding another layer. The layers are thin and I keep adding additional layers until I like the shine. This drawing probably has about 8 layers of the polymer varnish. 


Monday, May 11, 2020

Reflected Dots - Colored Pencil


At my studio and wondering what to draw next. I really had fun with the tea cups and polka dots that I finished recently and posted here on my blog so decided to try another. I put a few reflective and shiny objects together for a small still life and positioned everything to reflect the dots over and over. I thought the green leaves and organic shapes were a good contrast to the other objects.

I am working on UArt 800 grit paper and my own reference photo (see bottom) as well as working from the objects themselves. I started by layering Faber Castell Polychromos colored pencils and blending them into the surface with a bristle brush. The Polychromos are an oil based pencil so less waxy and blend better as the surface layer. As I continue to add color, I will use Prismacolor Premier Soft Core colored pencils and Caran d'Ache Luminance pencils along with the Polychromos. Both Prismacolor and Luminance are waxy and build strong color as they are layered.

This sanded paper is so textured that it smudges easily, so I have to clean often with a kneaded eraser. I keep a piece of blank scrap paper under my drawing hand to keep my from smudging colors while I draw.


To work on the surface I put down a layer of Black Caran d'Ache Supracolor Soft  watercolor pencil and then blended it with water for a smooth surface with no paper texture showing through. 

I did the same for the background using Grey Supracolor Soft watercolor pencil and blending it with water. The Grey took a little more work to even out than the Black. 


Here is my finished drawing, I used several blue, gray and violet pencils to complete my background. I also added a few dark gray colored pencils to the black surface in order to lighten it up. I also added the whites to the dots. The piece is almost complete so I can punch up some of the colors, add light and dark values/tones to different areas. I also used Prismacolor Verithin pencils on top of a few of the areas where I wanted rich darks and no paper texture showing through. These are the darkest areas on the coffee pot, the black cup in the front and the two red vases.


This is my reference photo, I chose to eliminate the blue reflections in the coffee pot. I found them to be a bit distracting to the rest of the composition.


Friday, March 13, 2020

Hot Spots!

What I am doing while the Coronavirus spreading and scaring us all is working on new drawings. I started and finished this colored pencil drawing within two weeks, however the idea as been percolating in my thoughts for about two months. I have been working on some new drawings with stacked tea cups as my subject matter (I will post the others later) and wanted to create a drawing with dots reflected from the surface onto the cups. I wanted to achieve a design with brightly colored cups against a dark background.

My reference photo is the last photo, I couldn't find a dotted paper for the tea cups to sit upon so I created my own in Adobe Photoshop, printed them out and taped the sheets together to form the surface. The next step was to place the tea cups in order to achieve interesting reflections on the cups themselves. I moved them around and pulled down window shades so less light was reflected onto the shiny surfaces of the cups. I took many photos and later chose the one I liked best. 

I chose UArt 800 grit sanded pastel paper for the surface. This paper holds many layers of pencils and builds brilliant color quickly. It also smudges easily, you can see the marks on the paper below. I used Faber Castell Polychromos colored pencils for the first layer of color. Polychromos are an oil based pencil and keep a harder point than some of the waxier brands. They are perfect for this sanded surface and for burnishing the color into the paper with a bristle brush in order to create a solid surface of color. I continued with Polychromos for subsequent layers but also used Caran d'Ache Pablo and Prismacolor colored pencils if I needed other colors I didn't have in the Polychromos box.  Pablo pencils are also oil based and keep a harder point, Prismacolor are wax based and softer so they are better for top layers of color. 

I spray the drawing in between layers with workable fixative to keep the color in place. 


To create the solid background, I used a Staedtler Karat Aquarelle black watercolor pencil. I loosely and lightly apply the strokes to the surface without worrying about putting them on evenly. I keep the layer light because when I add water with a brush, it becomes a vibrant black (the surface behind the cups). Add just enough water to dissolve and move the pencil around, try to keep it as evenly toned as possible.


I have a solid black surface and after it dries I will add lighter colors that will give me a variation in colors and tones for my background because I don't want it to remain a solid black that will overpower my tea cups. I used three colors predominantly for the background: Polychromos Caput Mortuum, Pablo Greenish Black and Pablo Dark Gray. I spray with workable fixative.

I work on my light colors last because of all the pencil dust that moves around. I add my white dots and punch up all the light colors just before the drawing is finished.

I am excited about this piece! Maybe I should create a series!


Below is my reference photo I took from my still life set up:


Wednesday, April 18, 2018

Watercolor Workshop

I haven't worked in watercolor for a while but here in Florida a watercolor workshop at the Society of Four Arts caught my eye. It was being taught at the Society of Four Arts by master watercolorist Sue Archer. The description intrigued me as it was for advanced artists and focused on color theory, composition and design. Feeling like I could use a "tune-up" or refresher in these areas, I signed up for the workshop and was not disappointed. The workshop consisted of five intense days of lectures, demos and working on our own exercises and watercolor compositions. I found myself coming early and leaving late because I was so inspired to work and mingle with the other participants. 


We worked using a limited palette of transparent or granulating colors only. The colors I used were: Hansa Yellow, New Gamboge, Quinacridone Red, Raw Sienna, Burnt Sienna, Manganese Violet, Cobalt Blue, Indanthrone Blue and Sap Green.

Here are some of my studies done in class. The top image are three simple (or not so simple) value patterns using three values only to merge shapes together. We then picked the value study we felt was most successful and added color in the fourth block.

Just below, we chose two white objects and set them up in order to see light and cast shadow. My first piece was worked in values of gray only. I went back in afterward and added some areas of reflected light in various grays. The lower piece is the same principle only using wet-on-wet technique with Raw Sienna, Cobalt Blue and Manganese Violet to create colorful shadows. Afterwards we created rich darks in a wet on wet background. 


The bottom six small paintings are wet on wet watercolor skies using transparent and granulating washes. I later took the next step and added a horizon and more detail to the washes. 


Monday, February 5, 2018

Sneakers in Progress


I'm continuing to work on this piece and added the ball as another element to the drawing. Next step is to tie the elements together with value and shadow. I have lightened the dark shadows around the sneakers with Polychromos Sky Blue #146 and burnished it with a bristle brush. I am working from a photo of the sneakers and shadows can look darker than in life. I used the same colors of Polychromos pencils on the ball as I used on the sneakers for continuity and composition. 

I still haven't used any white on the piece because I don't want it to smudge but I laid down a base color of Polychromos Cold Gray #1 on the top of the ball for value and will add some darker shadowing around the edges to show a rounding form. I am combining two different photos for this piece so it is a challenge to get values and shadows correct. 

In my last post I forgot to note the colors I used in the insides of the sneakers and they are the same ones I have used on the yellow stripe on the ball: Yellow Ochre 183, Dark Naples Ochre 184, Naples Yellow 185, Cream 102. I used Walnut Brown on the insides of the sneakers but not on the ball. 

Tuesday, October 3, 2017

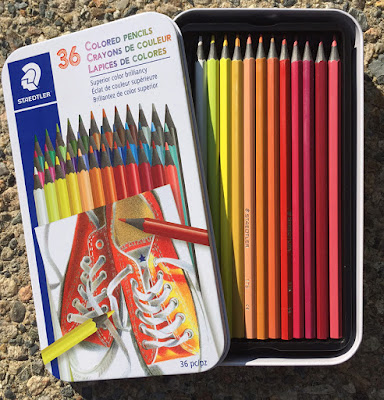
Package Design for Staedtler Mars Ltd.


 I was really excited to be contacted by the company artist supply Staedtler Mars to create a colored pencil drawing for their new line of brilliant colored pencils. The company had recently seen a drawing I worked on of Converse sneakers and asked me to recreate a similar drawing using their brand of colored pencils. The new line of pencils are just being introduced and come in sets of 12, 24, 36 and 72.

I have attached my initial sketch and my finished drawing below. The pencils are easy to work with, the points stay nicely sharpened and the leads don't crumble. The set of pencils in each tin is easy to transport for travel or sketching on the road! Give them a try!


Monday, June 19, 2017

Studies of Salt Water Taffy


I chose salt water taffy for my adult colored pencil students at Bristol Art Museum to draw studies of in our class. We had been working on changes in values and studying form and shape so this exercise was challenging. Several students struggled with the crinkles in the wrappers. Sometimes I take things for granted, what comes easy for me is not necessarily that way for my students. In this class most of the students are new to colored pencil and are brand new to trying their hand at art. Below are a few of their drawings, we worked on Canson Mi Teintes gray paper.


Thursday, March 30, 2017

Just Passing Through


I've just finished this colored pencil piece, it is 14.5 x 18.5" worked in all Prismacolor pencils. My surface is a cream colored rag mat board with some lined texture. I like the mat board because it is sturdy and soft enough to take layers of pencil, burnish and erase. I started this complicated piece by working one shell, coral or starfish at a time and gradually moved along until all of my subjects were 90% completed. Then I moved onto the background objects and finally finishing with the sand. The sand was the most complicated part, it needed some texture but just a small amount so it wouldn't detract from the busy shells and starfish forms. To create the texture in the sand and part of my starfish, I used the three erasers pictured above. 

I have just started experimenting with the Faber Castell Perfection eraser brush (looks like the old typewriter eraser) and like what it can do. It can erase but also softly remove only parts of color and burnish some remaining color into the surface, creating a softer erased effect. For the areas I want to remove all color down to the surface I used the Sakura Electric Eraser and smallest areas I used the Tombow Mono Zero which has a fine point. 

 Work in progress

My completed piece!

Monday, March 28, 2016

How to Start a Fine Art Collection

Pictured are three of my sea turtle paintings on sale at Epilogues, art and antiques in Bristol, Rhode Island.


I recently started thinking about how art appreciators and art buyers can start their own fine art collection after reading a post on Invaluable.com. During my many years of gallery sitting, I have often found that many people are often intimidated just to walk into a gallery to view artworks. Some people even think they shouldn't come in just to look if they aren't going to buy anything. We all love to view art and we all have our own preferences about types of subjects and styles of artwork we admire. So why is art intimidating? It isn’t! There is no right or wrong, you are free to enjoy any type of art you want to and to be unintimidated to go to any gallery or museum without hesitation just to view and learn more about art.

A nice way to start becoming familiar with art and artists is to start on the computer. Invaluable has a great website with many categories to help viewers become more informed by reading their articles about Must See Art Exhibits, 10 Contemporary Artists to Watch, Old Masters Perfecting the Art of the Frame and many other exceptional categories. You may decide that you’d like to start your own collection of art for your living space or for investment. Reading, researching and observing can assist in learning about art and becoming more familiar with styles of art and different artists in order to purchase and collect pieces. You may decide that you like the old masters’ work or the art of more contemporary artists. 

Under the For Collectors on the website, a person can find information about collecting many other categories such as antiques, fine jewelry, decorative art, furniture, Persian rugs, wines and even sports memorabilia. There are even tips for decorating and showing your art in your home. Would you prefer to buy art on line? Would you like to learn how to bid on items in an art auction right in your own home? There are also auction tips and where to find auction houses near your city. 

The Invaluable blog In Good Taste will aid in learning how to start a your own art collection and you can sign up to get weekly updates via email. I have found some great articles on the website. Some of the categories I enjoyed reading are How to Start a Fine Art Collection, 8 Must-See Art Exhibits This Spring, Specialists Speak: 2016 Trends & Predictions in CollectingHow To Flawlessly Flaunt Asian Art in Your Home, Up-and-Coming Wines To Collect (or Drink) This Winter and 7 Modern Marvels of Mid-Century Design.

Enjoy the many resources of this website and enjoy reading and collecting!

Sunday, June 28, 2015

Commission Work


I have been working on this colored pencil drawing of a bouquet of roses for a customer. She sent me photos of the roses and I chose the reference photo (top) which was the best to work from. I added three more roses to fill out the composition and make it more interesting. The middle photo is the drawing in progress. I worked this on Honeysuckle (?) Canson Mi Tientes paper, size of drawing is 7.5x10.5" The Mi Tientes paper is quite textured so I used the harder Faber Castell Polychromos pencils on top of Prismacolor Pencils to burnish or fill in space. 

The bottom is the finished piece, loosely drew the bottom area to blend and abstract the stems and leaves allowing the roses to be the focal points.