Showing posts with label Krylon Kamar Varnish. Show all posts

Wednesday, July 31, 2024

Varnishing Colored Pencil - Part 1

 There are times when I like to mount my colored pencil artwork on a cradled panel or present it in a floater frame as opposed to framing the art under glass. In order to do this I need to varnish the finished piece. Up until now I had been varnishing my colored pencil work with water based Golden UVLS Polymer Varnish. I wrote about my experiements with this particular method in a blog post, link here.

 However, Golden has discontinued the Polymer Varnish and replaced it with a new product (also water based) Golden Waterborne Varnish. I thought I could apply the Waterborne varnish the same way as I did the UVLS Polymer Varnish and found out the hard way both products are completely different. So I have decided to do some experimenting with different methods of varnishing my work.

These are the various products I using in my testing.  I first spray my drawing with a coat of Krylon UV Resistant Clear, let it dry for about 15 minutes and gave it another coat. I always spray my colored pencil as an isolation to fix the color so the color won't move or streak when I apply any kind of varnish. 

First experiment: 

I recently watched a video in which the artist is using gel medium as a varnish over watercolor so I decided to try it over colored pencil. I mixed the Golden Regular Gel Semi Gloss diluted with water, equal parts of each. After the second coat of UV Resistant clear was dry, using a 2" wide flat, soft bristle brush I brushed on a layer of the gel medium mixture carefully going in one direction only. As it dried I noticed  streaking and brush marks in some areas no matter how hard I tried to apply evenly (as indicated above). 

So I contacted Golden company and the customer service person suggested the Golden Open Acrylic Gel or Golden Soft Gel are better options for varnishing as they are both softer bodied and lay down smoother. I also found that using a newer soft brush works much better, the older ones either seem to stiffen up with use. There is good information on using Golden gels here.


Second experiment: 

I tried the same application but using the Liquitex Acrylic Gloss Varnish (after fixing my drawing with the UV Resistant Clear spray). The Liquitex varnish seemed to brush on smoother although I still got a few brush marks no matter how hard I tried not to. It is best to apply the gel in one direction and not go over the top again. I like the way the Liquitex looks after it dries, if I can get this method to work I would use this product. 

Third experiment:

 Using the Krylon Kamar Varnish spray as the final varnish. I fixed my drawings first the same way with 2 coats of the Krylon UV Resistant Clear. The two drawings above were then sprayed with 2 coats of the Kamar Varnish, allowing the first layer to dry (at least 30 minutes) before applying the second. As you can see, the Kamar varnish leaves a textured or mottled effect on my drawings that you can particularly see in the white area on the lobster drawing. It isn't so bad on the leaf drawing in which the entire surface is covered. 

In the next post I will write about my experiments with the Golden Gloss Waterborne Varnish. 

If anyone reading this has any feedback or has tried their own experiments, please contact me as I would like to hear about it. 


Monday, September 14, 2020

Colored Pencil Shell Study on Wood Panel


I drew this colored pencil piece on an 8x10" Blick Studio Wood Panel  with a 7/8" thickness. I like the smooth surface of the wood and it does not have to be sanded or primed to accept colored pencil. I selected three shells with different shapes and colors and decided how to arrange them on the surface. It took a little bit of figuring how I wanted them to look compositionally. 

First I drew the outlines with lead pencil and added some of the details to help me when adding color. I used Caran d'Ache Luminance and Prismacolor colored pencils to create this piece. The wood is soft so a softer pencil works really well on the surface. I was also able to build up layers easily. 

My drawing kind of evolved, I intertwined the shells and later put in a soft background suggesting sand and sky. 

The fixative/varnish is a three-part process. First I spray the drawing with Krylon UV Resistant Clear, two coats letting the first dry for 15 minutes. Secondly I spray the drawing with two coats of Krylon Kamar Varnish letting each dry for about 30 minutes in between. You may stop here and perhaps spray one more coat. I like a glossier finish so I add a third step. that is to apply Golden Polymer Varnish with UVLS. I mix one part varnish with two parts of water to thin the varnish so it can be easily brushed on with a soft bristle brush. I work in one direction when brushing on varnish and let it sit for about two hours until completely dry before adding another layer. The layers are thin and I keep adding additional layers until I like the shine. This drawing probably has about 8 layers of the polymer varnish. 


Saturday, December 28, 2019

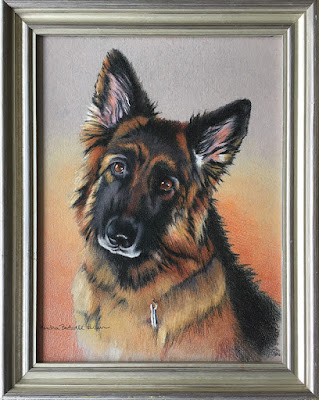
Colored Pencil Dog Portrait Commission


This is a recent 8x8" dog portrait I created in colored pencil for a client to give as a gift. The dog's owner lost this attractive guy earlier in the year and misses him terribly. I worked on Canson Ingres gray paper that I would later to mount to an 8x8" DaVinci Medium Textured Canvas Panel from Jerry's Artarama. You can see the progress in the photos above. I used Prismacolor, Caran d'Ache Luminance and Derwent Drawing brands of colored pencils to create the portrait. I also burnish the colored pencil layers with a stiff brush to smooth out the pencil and alleviate the texture of the paper showing through.

I recently purchased a set of 24 Derwent Drawing colored pencils and have been liking their soft buttery feel as well as the range of colors, many are earthy natural colors perfect for creating pet portraits. These pencils also claim to be extremely lightfast.I try to choose the most lightfast pencils for my works so they won't fade through the years.

After mounting and trimming the edges of the paper to the canvas panel, I spray varnish the piece and edges with Krylon UV Resistant Clear to seal the colored pencil and then 3 coats of Krylon Kamar Varnish allowing each layer to dry in between.


Tuesday, January 17, 2017

My Latest Pet Portrait


This is Brina, 8x10" in colored pencil on gray Fabriano paper. I worked Brina in Prismacolor, Lyra Rembrandt, Caran d'Arche Luminance and Derwent Artists colored pencils. The reason for all the different brands is because I like the different brown tones that I can't find in just one brand. I also like the variety of softness and hardness of the leads and just the feel of different pencils.

The piece is mounted on white gatorboard with double tack mounting film. I sprayed one good coat of Krylon UV Resistant Clear, then two coates of Krylon Kamar Varnish and about four coats of Golden Polymer Varnish with UVLS applied with a brush. I framed the piece without glass in this nice soft silver frame.

Brina is my brother's family dog who (unfortunately) recently passed away. This portrait was a Christmas gift for the family, a nice remembrance of the family pet.

Monday, July 21, 2014

Colored Pencil Cherries


Here is the 12x12" colored pencil drawing that I have been working on. As I mentioned in a previous post, I am working on 12x12" cradled Ampersand Gessobord with a coating of Colourfix liquid primer to hold the layers of pencil. I began by putting down one layer of color in the cherries and then adding solvent (odorless mineral spirits) with a small brush to the pencil to dissolve it and make it start to flow like paint. Into the wet pencil, I added more layers of pencil and then almost a dry brush to dissolve those layers and make them flow. This is how I achieve such rich colors. When the cherries were finished I worked the stems and then the shadows and patterns of the dish below in the same way but careful around the edges of the cherries. I find it's better to use less solvent so it doesn't get runny or to dab the brush on a cloth or paper towel before applying it to the drawing. For the white surface under the plate I used white Prismacolor and white #8052 Stabilo Aquarellable pencil. I like the Stabillo pencil because the lead is soft but not flaky and I can get good white coverage.

To finish this piece, I will spray with Lascaux Fixativ to preserve it. Next I will spray three coats of Krylon Kamar Varnish letting each dry in between.

Friday, June 13, 2014

Bandit's Portrait


I just finally finished this little 8x8" pet portrait of my dog, Bandit's face. I had a small piece of this gray flecked paper with a pattern of small lines running vertically which I believe could be Fabriano Ingres. It is a beautifully textured paper to work on and the gray background was perfect for Bandit so I left the paper showing through around him. I then mounted the paper to an 8x8" Ampersand cradled Clayboard and sprayed it with Lascaux Fixativ to preserve it. Next I sprayed three coats of Krylon Kamar Varnish, letting each dry in between. After which, I brushed on at least six coats of Golden UVLS Polymer Varnish so the piece is quite glossy. It is finished in the same manner as the black lab in this previous post.

My dog Bandit has such a great personality, he is very quiet (except when he sees a squirrel or plays with other dogs) and follows me around everywhere. I treat him like a person and he can be very stubborn at times and also spoiled, he is the only child after all. He weighs in at only 10 pounds but thinks he is a big dog in a little dog's body. I bring him to the studio and he will lay on his bed near me while I work. Who could ask for a better best friend? I love him dearly and wanted to capture his personality forever in this drawing.

Sunday, April 6, 2014

Pet Portraits


I've started a small (8x8") pet portrait of my Yorkie, Bandit's, face close up. I'm working on a Fabriano paper in which I love. It has a textured surface with faintly impressed vertical lines that add a nice texture and pattern to the drawing. Unfortunately, I can't recall or find the name of this paper and I'm not sure if Fabriano even makes it any more. Someone gave me a few sheets more than ten years ago and I just happened to have a small sheet left. I always start with the eyes and nose because those are the most important features to capture the pet's likeness and personality.


Here are two finished dog portraits of this black lab, Ike. Sadly, Ike was hit by a car at a very young age and isn't with us any more. His owner misses him very much. But here is a nice story: the coworkers of his owner got together and commissioned me to create these 8x8" portraits of Ike as a remembrance for Ike's owner. I will be curious to find out how Ike's owner likes these two pieces when he receives them.

I worked the two drawings on white Stonehenge drawing paper and Prismacolor pencils, I cut the paper to 8 1/2 x 8 1/2". When the drawings were complete I sprayed them with two coats of Krylon UV Resistant Clear fixative. Then I attached them to two 8x8" Ampersand Cradled Claybord panels with Grafix archival double stick mounting film and then carefully trim the edges with a mat knife. I always create the drawing a little larger than the board I am mounting it to in case it moves a little. Next I spray the entire piece and edges with three coats of Krylon Kamar Varnish to seal it (or any permanent non-yellowing varnish will work). The final step is to brush on Golden UVLS polymer varnish (water based) and thinned three parts varnish to one part water. Brush carefully in order to not get bubbles and keep it consistent. I will layer on three or four more coats of the Golden varnish letting each dry at least an hour or more in between. I also put two coats on the wood edges. Or you can paint the edges.

Monday, October 28, 2013

Colored Pencil on Ampersand Pastelbord


Here is my finished piece from the colored pencil and solvent on Pastelbord instructional video I produced for Ampersand. Here is a link to Ampersand's blog post on the two instructional videos. For this piece I worked on 8x10" Gray Pastelbord and not only do I like the textured surface for layering colored pencil but the Gray is my choice of color for many of my drawings. The cool blue/gray toned surface creates a under tone for a warmer colored drawing on top. I've taken art workshops in which instructors have suggested layering warm colors over cool colors, over warms over cools, or vice versa to create vibrant color and color harmonies.

After I chose the vibrant red pitcher to demo for Ampersand, I tried several pieces of fabric behind the pitcher to see what worked best for the background. I chose this one with the intricate leave patterns because I was attracted to the organic shapes  of the leaves contrasted with the round, smoothness  of the pitcher. I also like the contrast in the grays and blues of the leaves against the bright red and especially the movement of the background shapes which complete the composition.

I finished the piece by spraying it with two coats of Krylon UV Resistant Clear and then four coats of Krylon Kamar Varnish, letting each coat of the varnish dry at least 30 minutes before adding spraying again. This way I won't have to frame the piece under glass.

Thursday, March 28, 2013

New Grouping of Boxes


Started another grouping of my Ocean Life boxes on 5x5" Ampersand Claybord boxes. I have sold several of the last series of boxes and decided to create another series of boxes. Shown here are seven new cover drawings and three new inside drawings. All of the cover drawings are worked on white Stonehenge paper with image transfer and colored pencil. I adhere them to the Claybord surface of the box top with Grafix Double Tack Mounting Film. I like the bottom drawings to be sturdier so I use white Strathmore rag illustration board, again with image transfer and colored pencil and glue them onto the bottom. The box top drawings are sprayed with one coat of Krylon UV Resistant Clear, three coats of Krylon Kamar Varnish and then several layers of Golden Polymer Varnish with UVLS to make them smooth and glossy.

In the last series I left the natural wood box sides showing and varnished them for protection. In this series I've decided to experiment with painting the wooden sides or collaging some of the box sides with rice paper. I'll explain that in my next post about the boxes.

Thursday, March 8, 2012

Experiments with Colored Pencil and Varnish

This photo is a cropped portion of a 12x16" colored pencil and pastel drawing I did several years ago. In fact it was accepted into and shown at the 2007 CPSA Explore This! Exhibition in Brea, CA (before Explore This! exhibitions became on-line only). I did the drawing is on black Stonehenge paper with colored pencil and bumped up the vibrant colors with pastel on top. The drawing looked so vibrant until I put it under glass to frame the piece. It made the rounds to different exhibitions but never sold so it came back to my studio and hung for a few more years. If it was light in the studio, the piece looked very vibrant but if it was a dark day, it looked dull. I kept glancing at the piece and wondering if I could somehow varnish it so that it wouldn't need to be shown under glass but I was afraid to varnish paper. After reading and learning about Ester Roi's blog entries on glassless framing, I came up with an idea. What did I have to lose? Just a piece of artwork ... but it was worth a try.

First I unframed the piece and adhered just the drawing to a 12x16" Ampersand Claybord with Grafix double tack mounting film adhesive. Next I sealed the drawing with Lascaux UV Protect spray, let it dry and then sprayed two coats of Krylon Kamar Varnish to seal and protect the drawing. I thought the spray might darken the colors but they were vibrant enough and remained so. The drawing sat for 24 hours and next I brushed on several coats of Golden UVLS Polymer Varnish Gloss letting each one dry in between. Here came the problem; I wasn't careful enough when brushing on the varnish, not only was I getting tiny air bubbles but I was getting brush marks. I tried to smooth out one "gloppy" area after the varnish had begun to dry and thus ended up with brush marks. Because the surface is so glossy, if I held the piece to the light, one could see all the imperfections. I learned that you have to be very, very careful when applying the Golden UVLS Polymer Varnish, any imperfection on the surface can be easily seen and detracts from the artwork.

I remembered that when I called Golden company tech support, the person I spoke to told me to be sure the artwork was sealed and protected with a spray varnish before brushing on the polymer varnish. The polymer varnish is water based and he told me that for conservation purposes, if museum quality artwork needed to be cleaned and re-preserved years from now, the polymer varnish could be easily washed off, the piece cleaned and preserved as the layer of spray varnish would not wash off and preserve it.

I was very frustrated with my piece so I took it to the sink and proceeded to wash off all the layers of the polymer varnish, holding my breath and just hoping I wouldn't damage the artwork. All of the polymer varnish washed off but the piece looked wet and cloudy for about a day. I was worried and discouraged I might have ruined it but was pleasantly surprised when I came back to the studio two days later and found the drawing perfectly dry, looking like it had before I started. The double tack mounting film kept the drawing perfectly adhered to the claybord also. I was really happy! I began again brushing on coats of the polymer varnish, much more carefully this time. I made sure I diluted the varnish exactly two parts varnish to one part water and let each coat dry before I applied the next. I didn't count how many coats I applied but I think probably about 6 or 8. I'm very excited because I accomplished what I set out to do, with a little bump in the road in which I learned from. I'm ordering a frame and will exhibit the piece in my studio or in a gallery and will most interested in viewers' comments.

Tuesday, May 17, 2011

Orchid Drawing is Complete

Since my last post of this drawing, I decided on a blue background which is mostly Prismacolor Blue Violet Lake and the surface is Prismacolor Gingeroot. I chose the cool blues and cool greens in the leaves to make the flowers pop. When the background was complete and I worked on the pot, I then returned to the flowers and punched them up with more color. I particularly worked on the three blossoms on the right which are my focal point. I didn't use any solvent on this piece which makes it look more like a drawing than a painting with the surface texture showing through.

Its been raining here for days so working on this piece made me feel better about our dreary weather because it is so colorful and cheerful.

I sprayed the drawing with Lascaux fixative and Krylon Kamar Varnish to finish and seal the colored pencil. And I chose to frame the piece in a light wood floater frame which gives it a contemporary look.